Filing a GST refund
A start-to-finish walkthrough: set up the helpers, add a client, and turn a client's GST portal downloads into a checked, upload-ready RFD-01.
9 min readA GST refund is money the tax department owes back to a business. Today Kaarta supports two kinds:
- Export under LUT. When a business exports without charging GST (under a Letter of Undertaking), the GST it paid on its purchases builds up unused. This claims it back.
- Inverted duty. When a business pays more GST on what it buys than it collects on what it sells, the extra credit builds up. This claims back the difference.
You give Kaarta the files a business already downloads from the GST portal. Kaarta extracts every line, fills in the missing details, lets you check them, and produces the exact files the portal wants for the refund application (form RFD-01), plus an Excel copy for your records. Refunds is a CA-firm workspace: you prepare them one client at a time, and nothing is filed without your sign-off.
Set up
Install the Kaarta extension, keep the GST portal open, download the files.
Add the client
Record the business you are claiming for.
Create the refund
Pick the type and the period.
Sources
Upload GSTR-2B, GSTR-1 and (optional) an HSN master.
Review
Confirm the code, category and eligibility on every line.
Export proof
Pull FOB and EGM from customs for export lines.
File
Generate the JSON, upload to RFD-01, mark it filed.
Before you start
Two of these are one-time. The third you do for each refund.
1. Install the Kaarta Chrome extension. Open the Chrome Web Store, search for Kaarta, and click Add to Chrome. Then click the puzzle-piece icon in Chrome's toolbar and pin Kaarta so it stays visible. Kaarta uses the extension to read product codes from the GST portal for you (see Review).
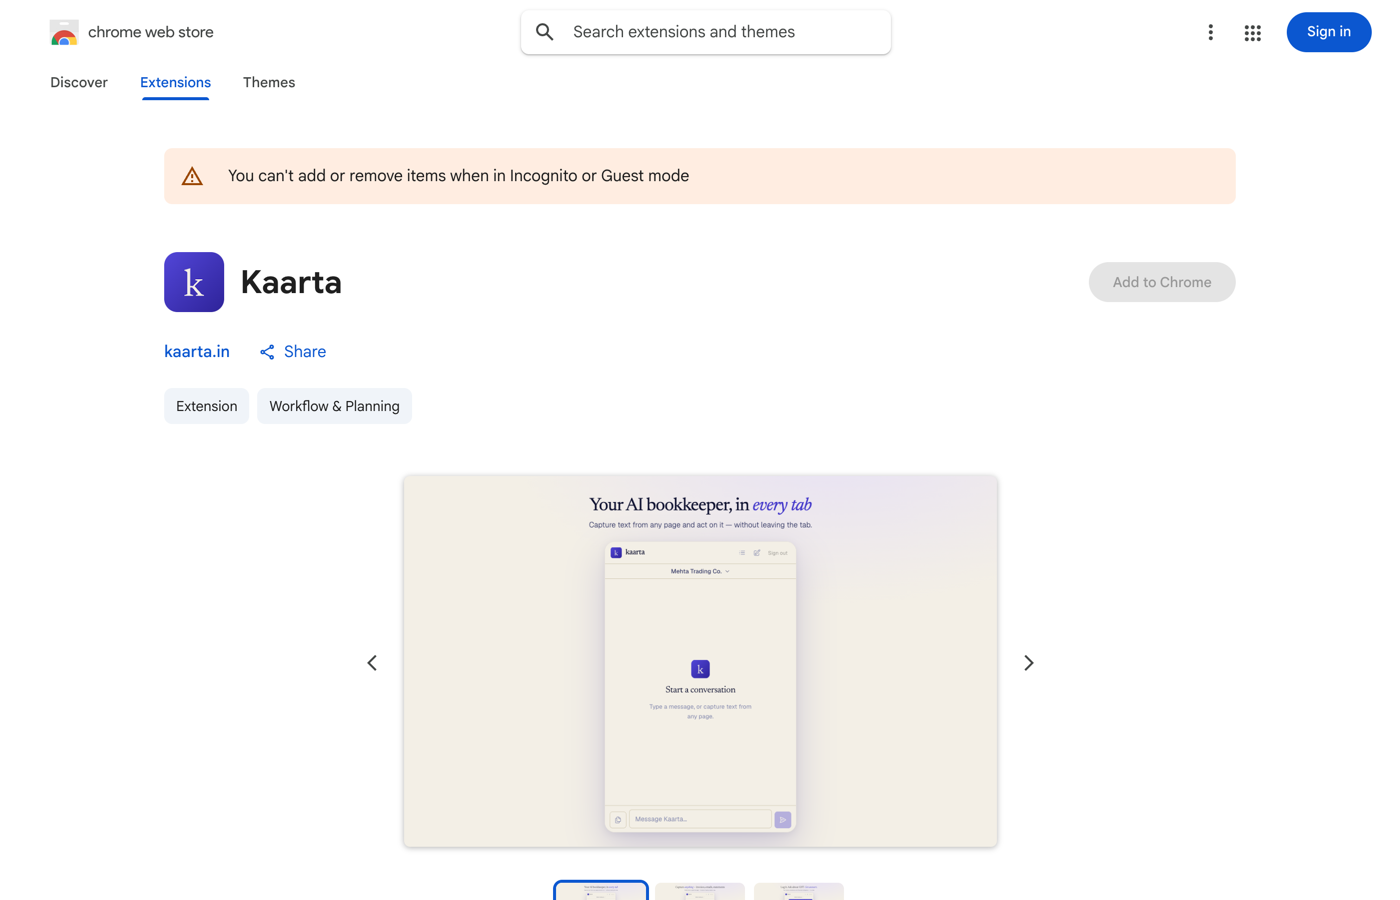 Add the Kaarta extension from the Chrome Web Store
2. Keep the GST portal open in another tab. Sign in at gst.gov.in and leave the Search Taxpayer page open. When a product code is missing, Kaarta looks it up through this logged-in tab. It reads only the codes it needs and stores nothing.
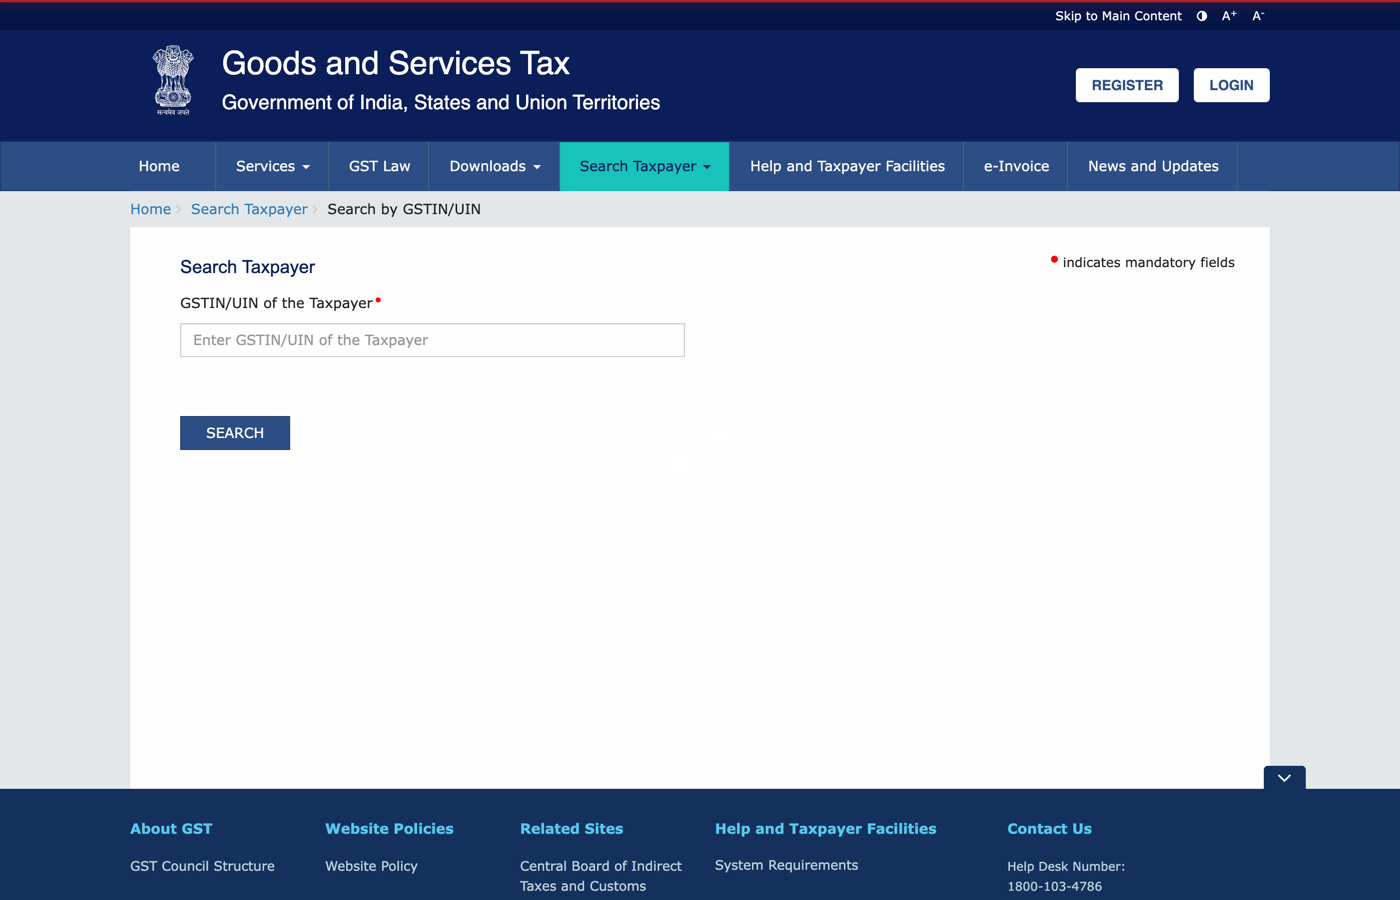 Sign in to the GST portal and leave Search Taxpayer open
3. Download the period's files from the GST portal: the GSTR-2B (always), and the GSTR-1 if it is an export refund. Formats are covered in Sources below.
Add the client
You prepare a refund on a client's behalf, so add the business first. Open Clients in the sidebar and click Add client.
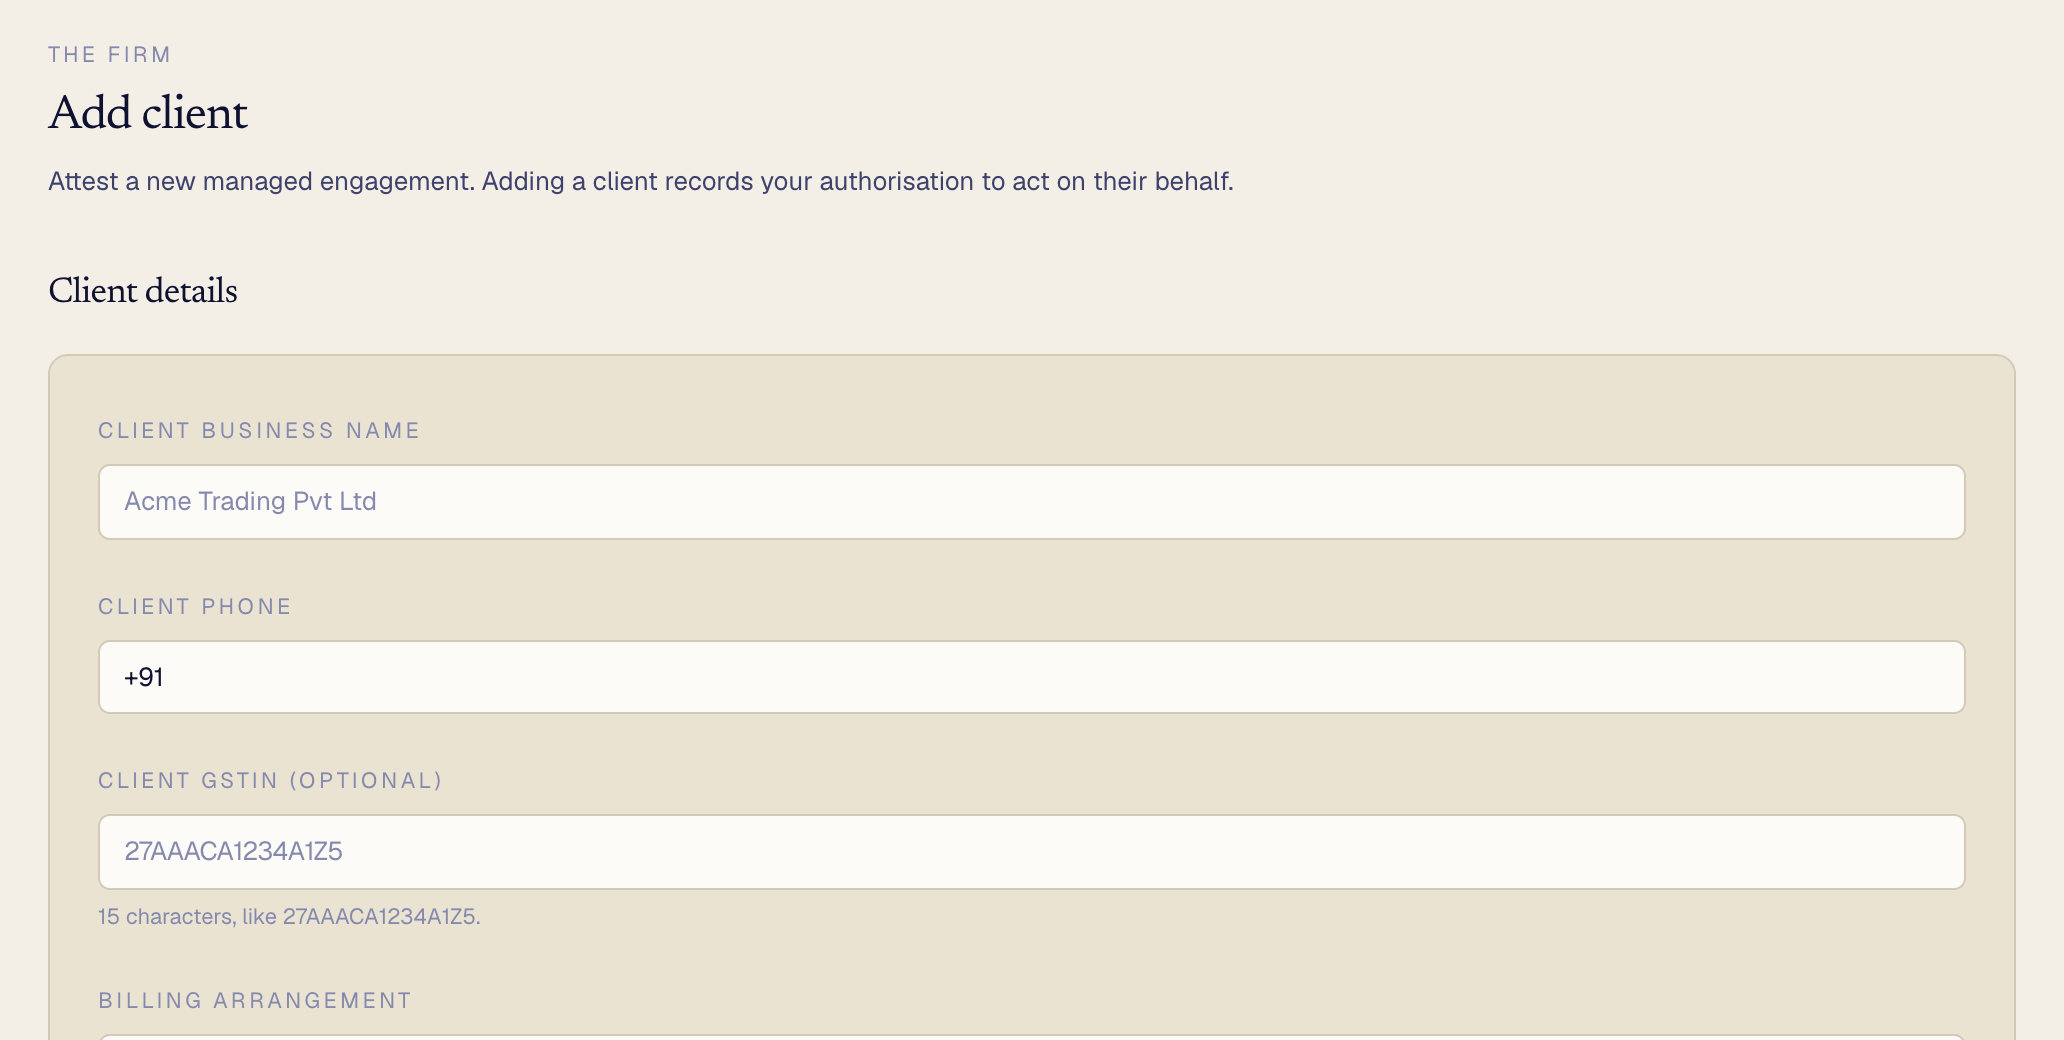 The Add client form
Fill in:
- Client business name (required).
- Client phone and Client GSTIN (the GSTIN is optional but worth adding, it is 15 characters like
27AAACA1234A1Z5). - Billing arrangement, which defaults to billing bundled into your firm's bill.
Click Add client. This records your authorisation to act for them and they now appear in your client list.
Create the refund
Open the client, then click New refund. A dialog opens.
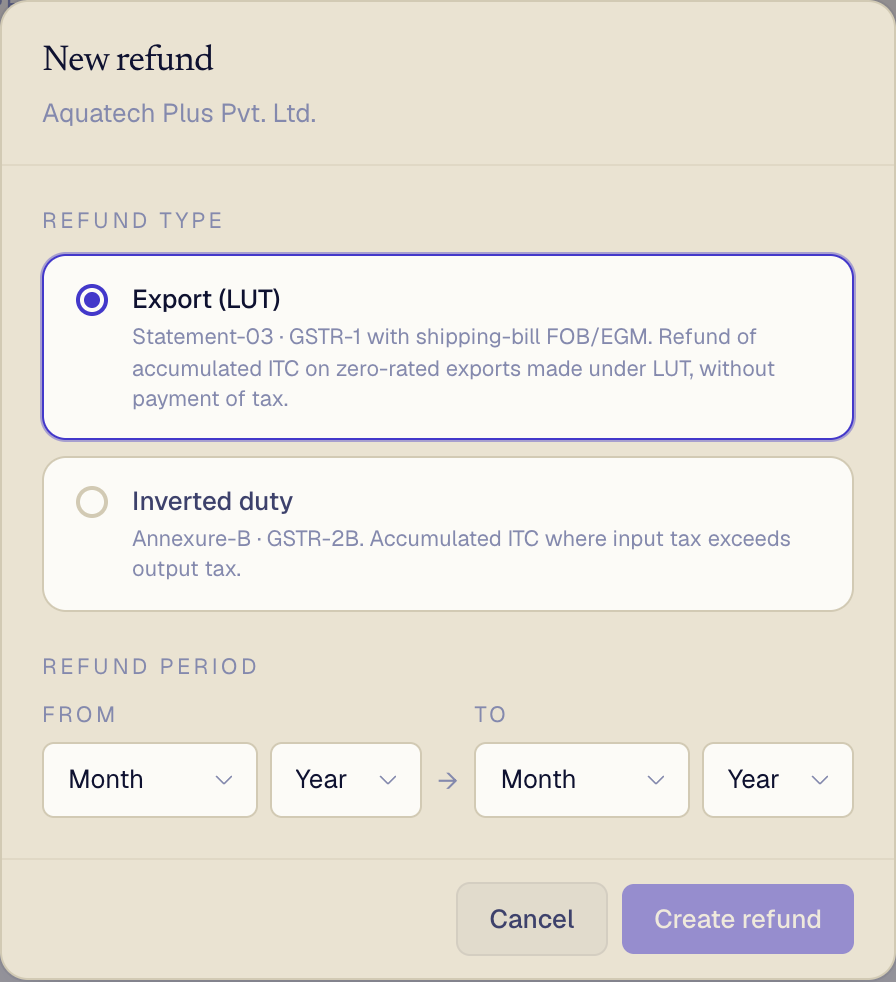 The New refund dialog: choose the type and period
- Refund type. Choose Export (LUT) for zero-rated exports under a LUT, or Inverted duty where input tax exceeds output tax. The dialog notes which annexures each needs.
- Refund period. Set the From and To months. Most refunds are a single month, so set both the same.
Click Create refund. You land on the Sources tab, ready to upload.
1. Sources: add the files
A refund is built from the files the client downloads from the portal. Drop each file on its card. Kaarta reads it, pulls out the lines, and remembers it. Drop a new file any time to replace it.
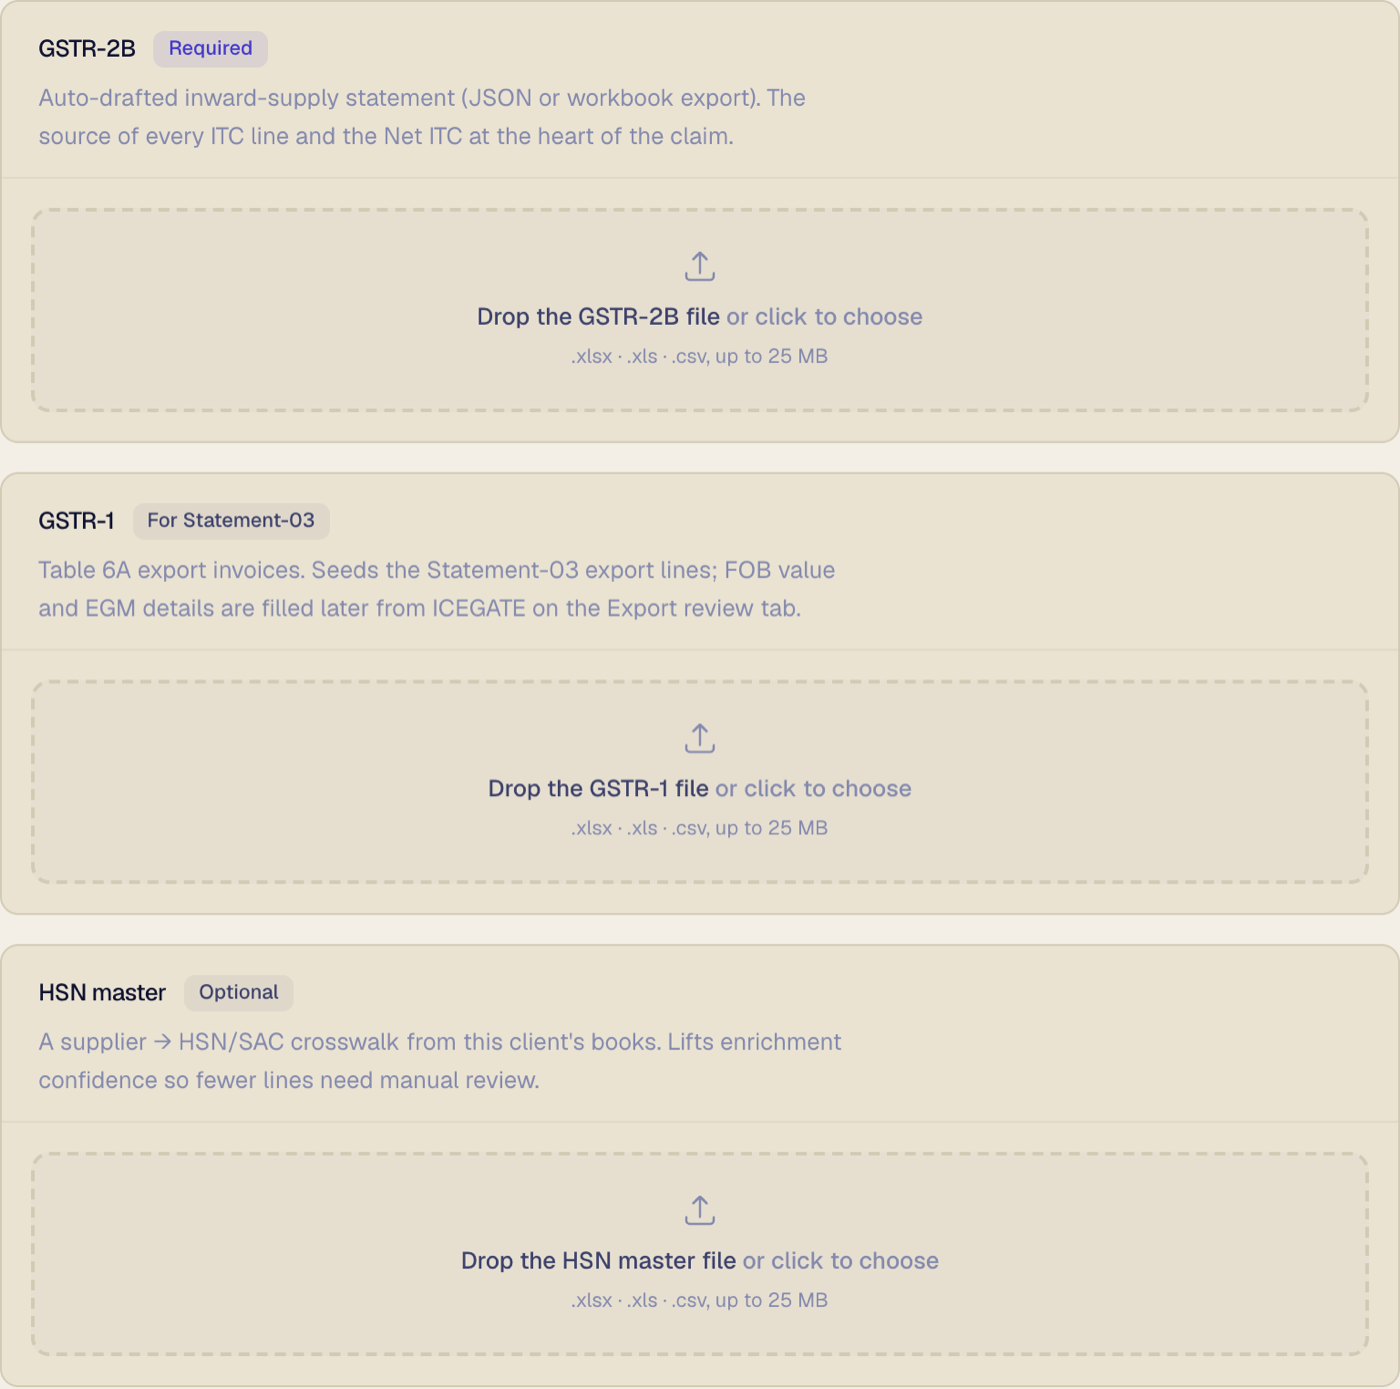 The three source files and their accepted formats
- GSTR-2B (required). The auto-drafted statement of every purchase and the GST charged on it. This becomes the claim itself.
- GSTR-1 (export refunds only). Your Table 6A export invoices. These seed the export lines; the shipping proof is filled later from customs.
- HSN master (optional). Your own supplier-to-HSN-code list from the client's books. Add it and far fewer lines need checking by hand.
Accepted formats. GSTR-2B accepts the portal's JSON export or an Excel workbook (the sheets named B2B and CDNR). GSTR-1 accepts the export-invoice sheet. The HSN master is a sheet with a GSTIN column and an HSN column (a supplier-name column and an IN/IS/CG type column are optional). All accept .xlsx, .xls or .csv, up to 25 MB.
About the period. The period decides which rows are used. A purchase dated inside the period is kept; one clearly dated outside is skipped, and Kaarta tells you how many. Rows it cannot date are always kept, never silently dropped.
To change it (only while the refund is a draft), click Edit next to the period, set the From and To months, and click Save period.
 Editing the refund period on Sources
2. Review: check every line
This is the main step. Each purchase from the GSTR-2B is one row: who it is from, the invoice, the taxable amount, and the parts Kaarta worked out, the category, the HSN code (the product code GST uses), and the eligible ITC (the input tax credit you can claim on it).
 The review grid: code, source, confidence and claimable amount per line
The HSN/SAC column shows a tag for where each code came from and a confidence percentage next to it.
HSN master, Portal, AI, and so on) tells you the source; the percentage is how sure it is. Lines from trusted sources at high confidence are pre-cleared, so you only spend time on the doubtful ones.Category and eligibility. The category is Inputs, Input services or Capital goods. Capital goods cannot be claimed in a refund, so Kaarta sets their eligible ITC to zero and strikes the line out (the greyed row above). For inverted-duty refunds, input services are excluded too.
Open a line to check or change it. Click any row and its full detail opens on the right: the invoice and tax it read, the category (with the reason for it), and the HSN code (with the ranked alternatives, if any). Change the code or category here.
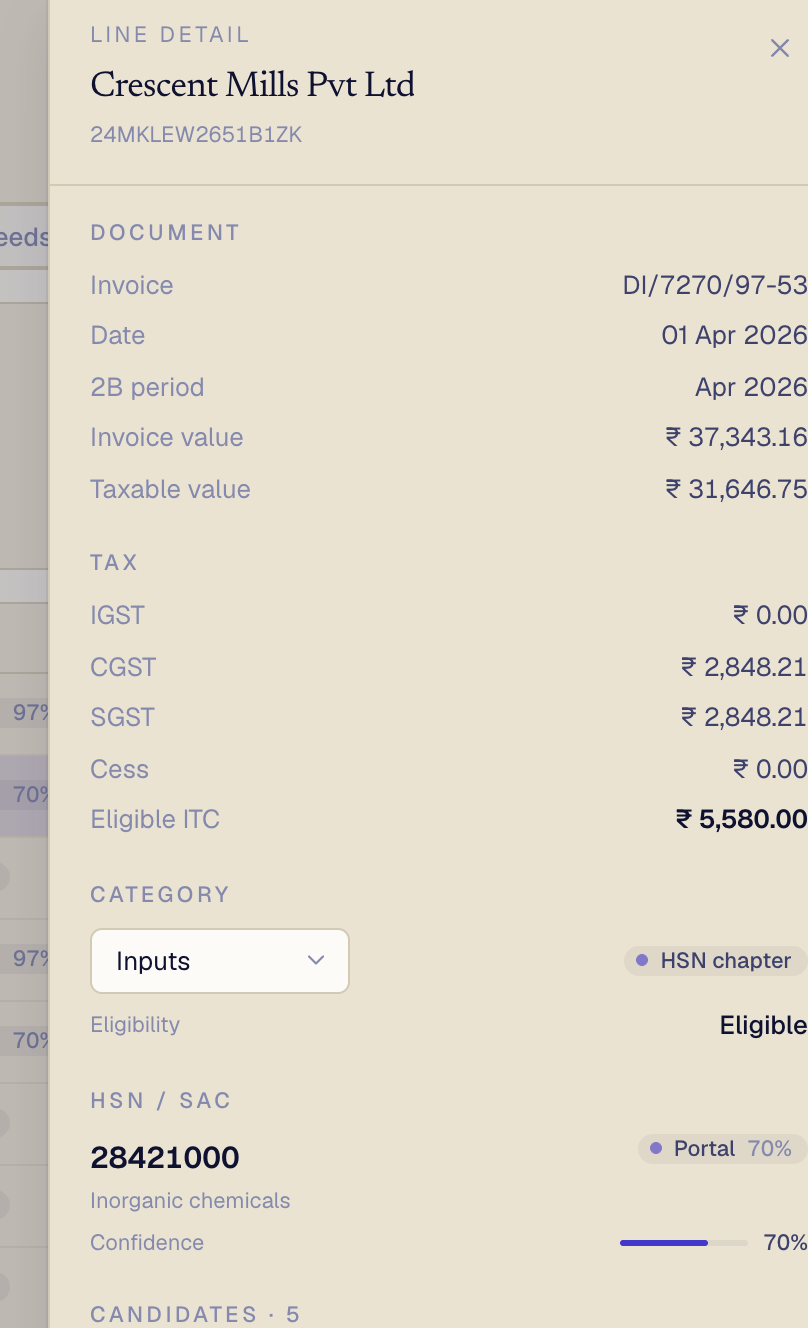 A line's detail, with the category reason and HSN source
- Confirm a line to lock its code. Confirming also applies that code to every other line from the same supplier and remembers it for next time.
- Exclude a line to drop it from the claim entirely (use this for a purchase that is not eligible). Excluded lines are removed from both the Net ITC and the final files. Click the line's Exclude button again to bring it back.
When a code is missing. If Kaarta could not place a supplier's code, a banner appears.
 The banner for suppliers that still need a code
Click Look up on GST portal. Using the portal tab you left open, the extension reads each supplier's registered HSN codes and offers them to you; a count shows how many are done. Pick the right one for each. Once every line is checked, Confirm all clears the rest in one click.
A purchase is missing. Click Add rows, then paste a block straight from Excel in the column order shown (Supplier GSTIN, Supplier name, Doc type, Invoice no, and so on through Eligible ITC), or type rows by hand. Click Add rows to save them.
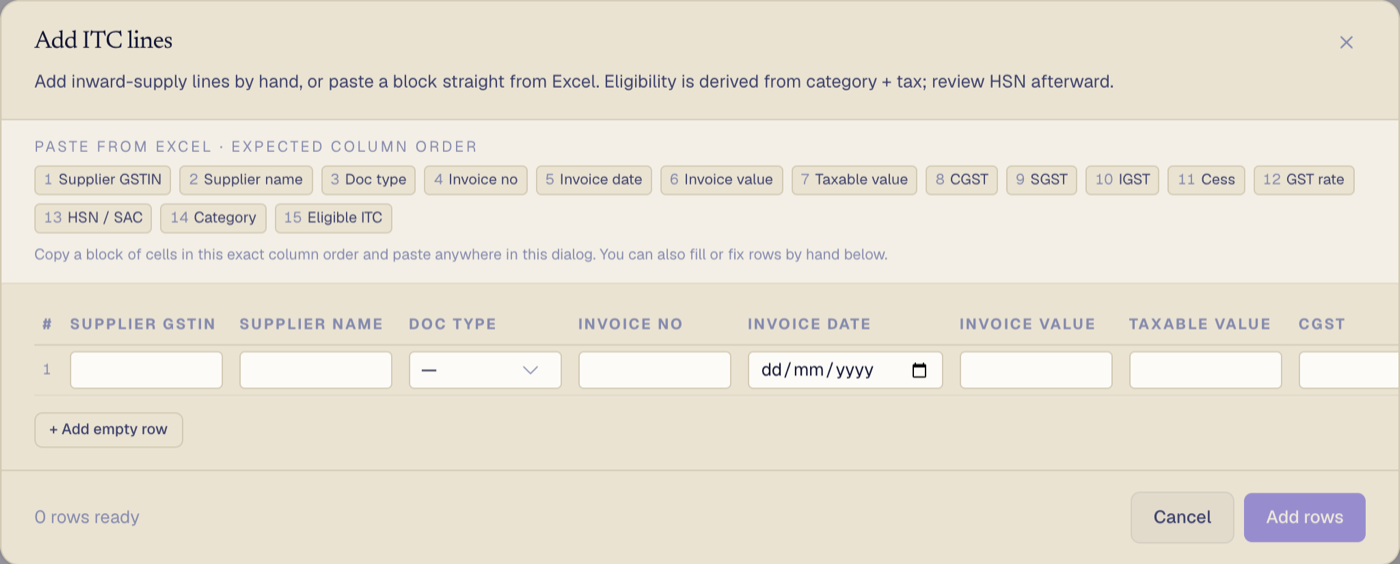 Add rows: paste from Excel in the listed column order
Reversals. Some credit has to be given back under Rules 38/42/43 and Section 17(5). Click Reversals, enter the CGST, SGST, IGST and Cess amounts under each heading, and click Save reversals. The total is subtracted from the claim, and Net ITC after reversals updates as you type. The Net claim figure at the top of the page always reflects your latest edits.
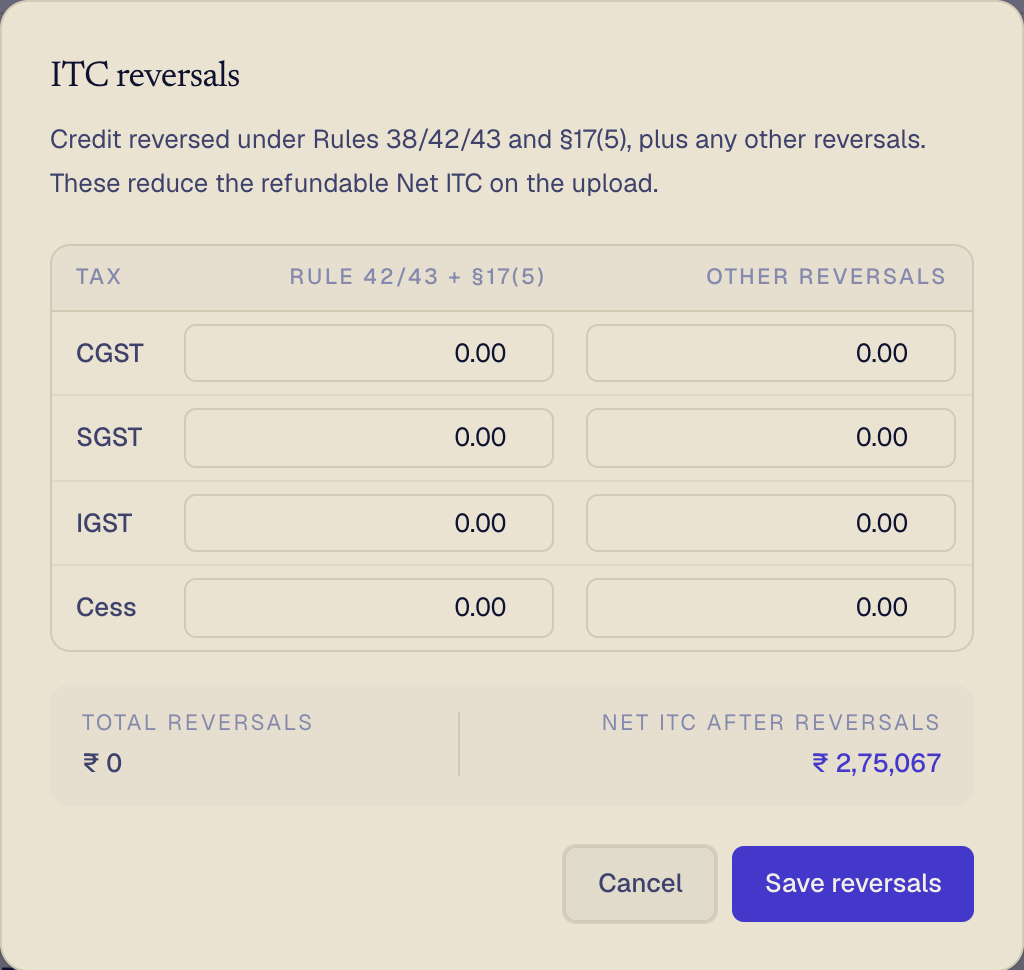 ITC reversals reduce the Net claim
3. Export review: the shipping proof
For export refunds only. The export invoices from your GSTR-1 are listed here, and they need proof the goods actually left the country.
 Export lines, with FOB and EGM fetched from customs
Click Fetch FOB & EGM from ICEGATE. For every goods line that has a shipping bill number, date and port code, Kaarta queries ICEGATE (the customs system) and fills the FOB value (the export value customs recorded) and the EGM reference (the manifest confirming the goods shipped). It reports how many lines were filled, how many are still awaiting an EGM, and how many came from cache.
- For services, there is no shipping bill, so add the bank certificate (BRC or FIRC) on the line by hand.
- If a goods line is missing its shipping bill or port, type it into the line, or click Add rows to paste a batch.
4. File: generate and upload
Open the Outputs tab. Before building anything, Kaarta runs its checks.
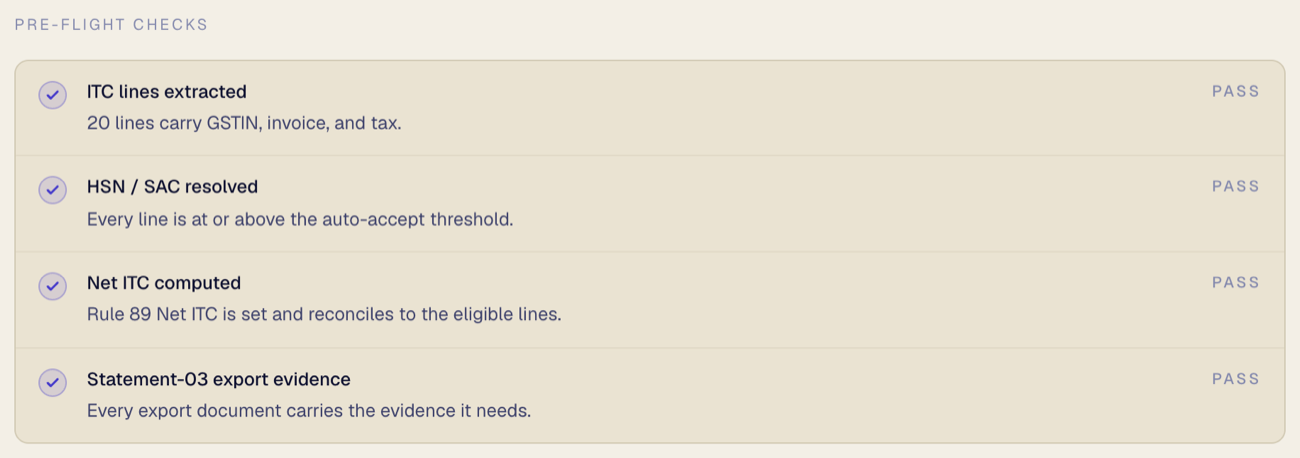 The pre-flight checks that must pass
A green tick means that part is sound. A blocked check tells you exactly what to fix and on which tab (for example, a line still missing its code). Fix or exclude what it flags, then carry on. When every check passes, click Generate upload files.
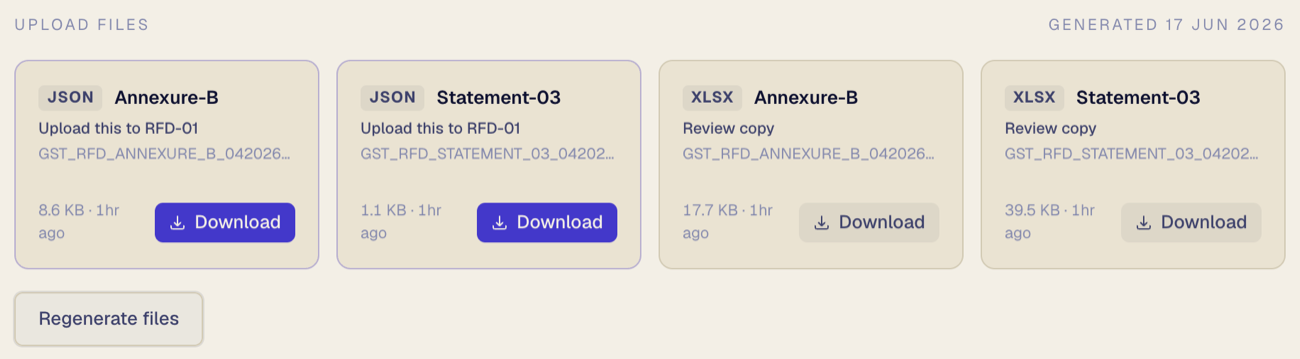 The generated files, ready to download
You get four files:
- Annexure-B (JSON) and Statement-03 (JSON), marked Upload this to RFD-01. These are what you upload to the portal.
- An Excel review copy of each, for your own records.
Download each JSON, upload it to RFD-01 on the GST portal and submit the application there. Then come back and click Mark as filed to lock the refund. If you change anything afterwards, click Regenerate files to rebuild the JSON.
Tracking your refunds
Every refund you are preparing shows on the Refunds home. The cards across the top count them by stage.
 What the four status cards mean
- Open: started, not yet reviewed.
- In review: waiting on your checks.
- Ready to file: files generated, ready to upload.
- Filed: uploaded and locked.
The table below lists each client's refund with its type, period, Net claim, and how many lines still need you. Click any row to open it and pick up where you left off.